How to run react source code repository in local environment
May-26, 2024 · 10min
change languageLearn how to set up a react source code development environment in a local environment, including environment configuration, dependency installation, Flow type checking, test running, and packaging and building.
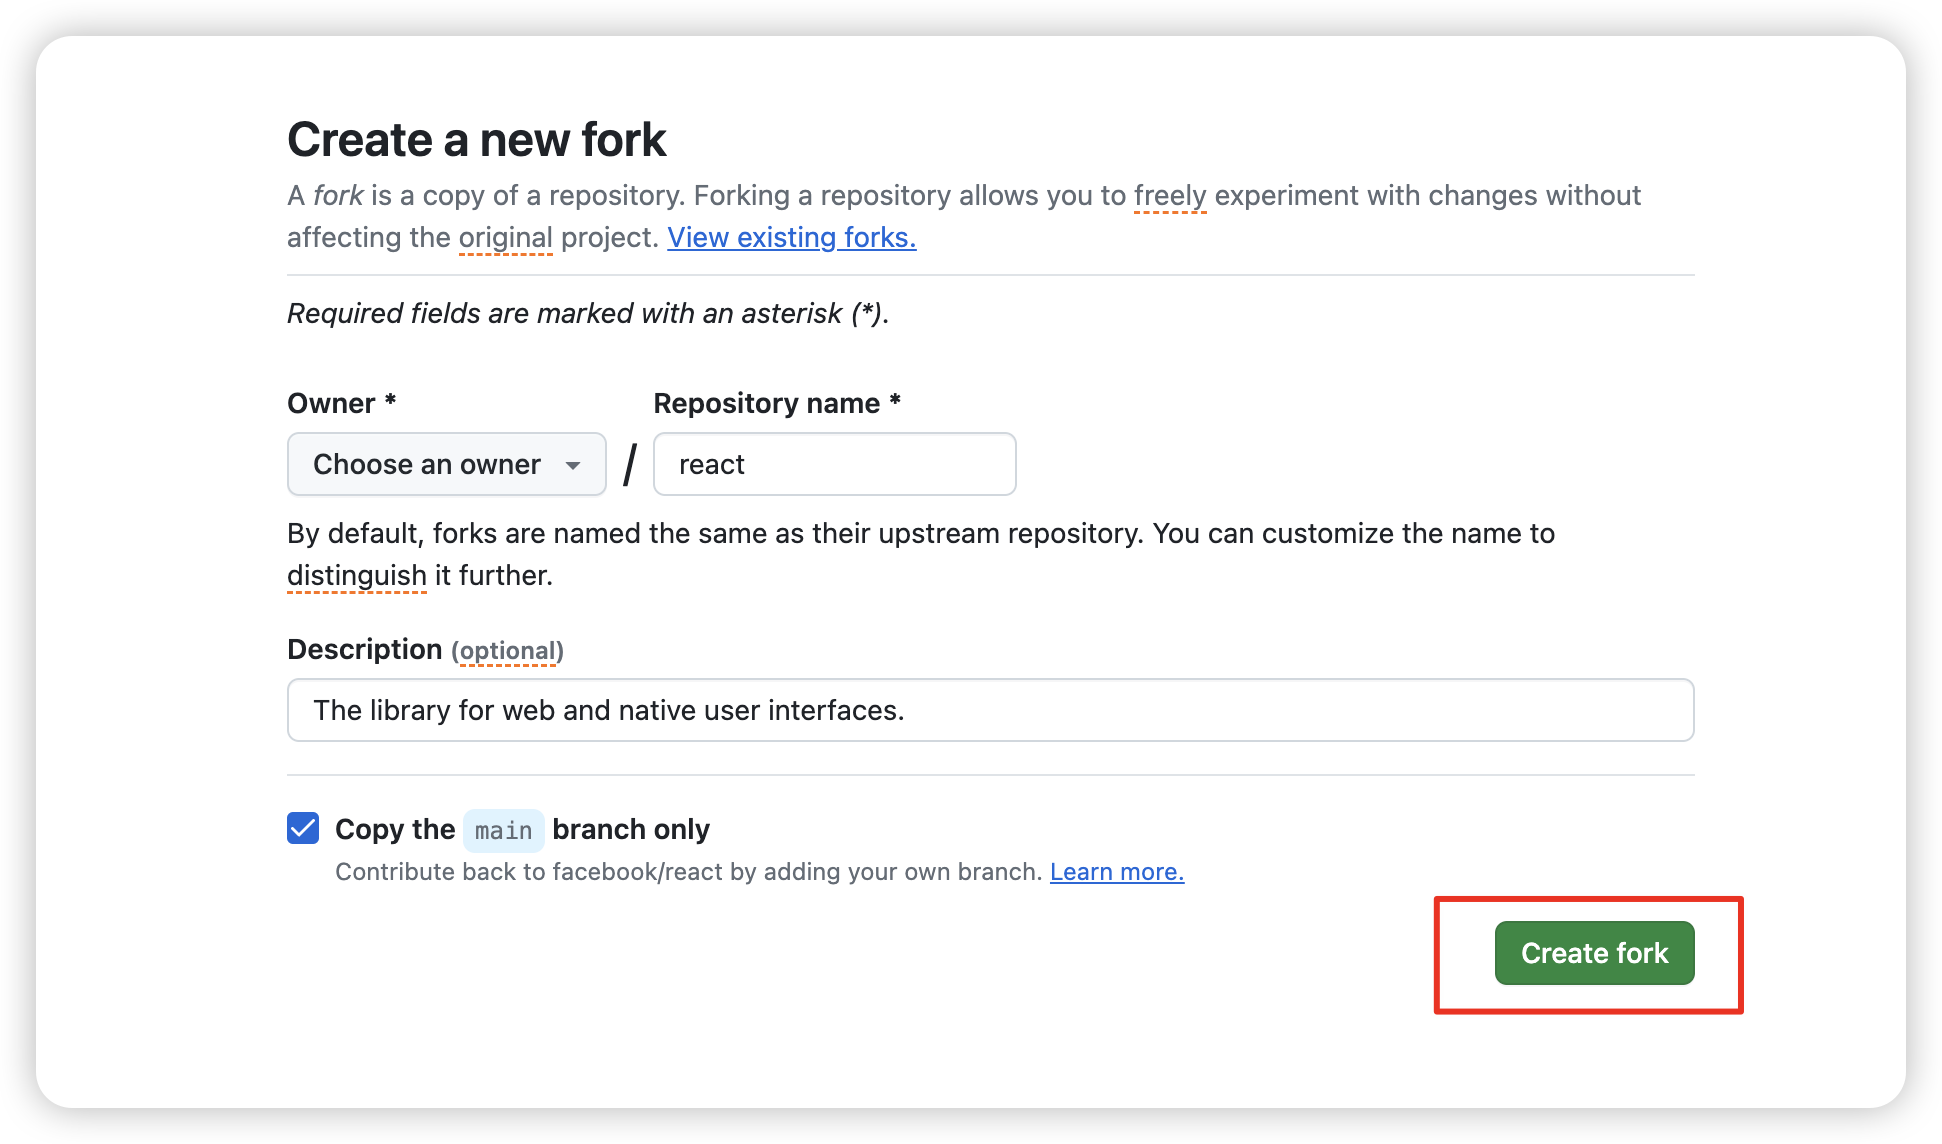
Fork Official Repository
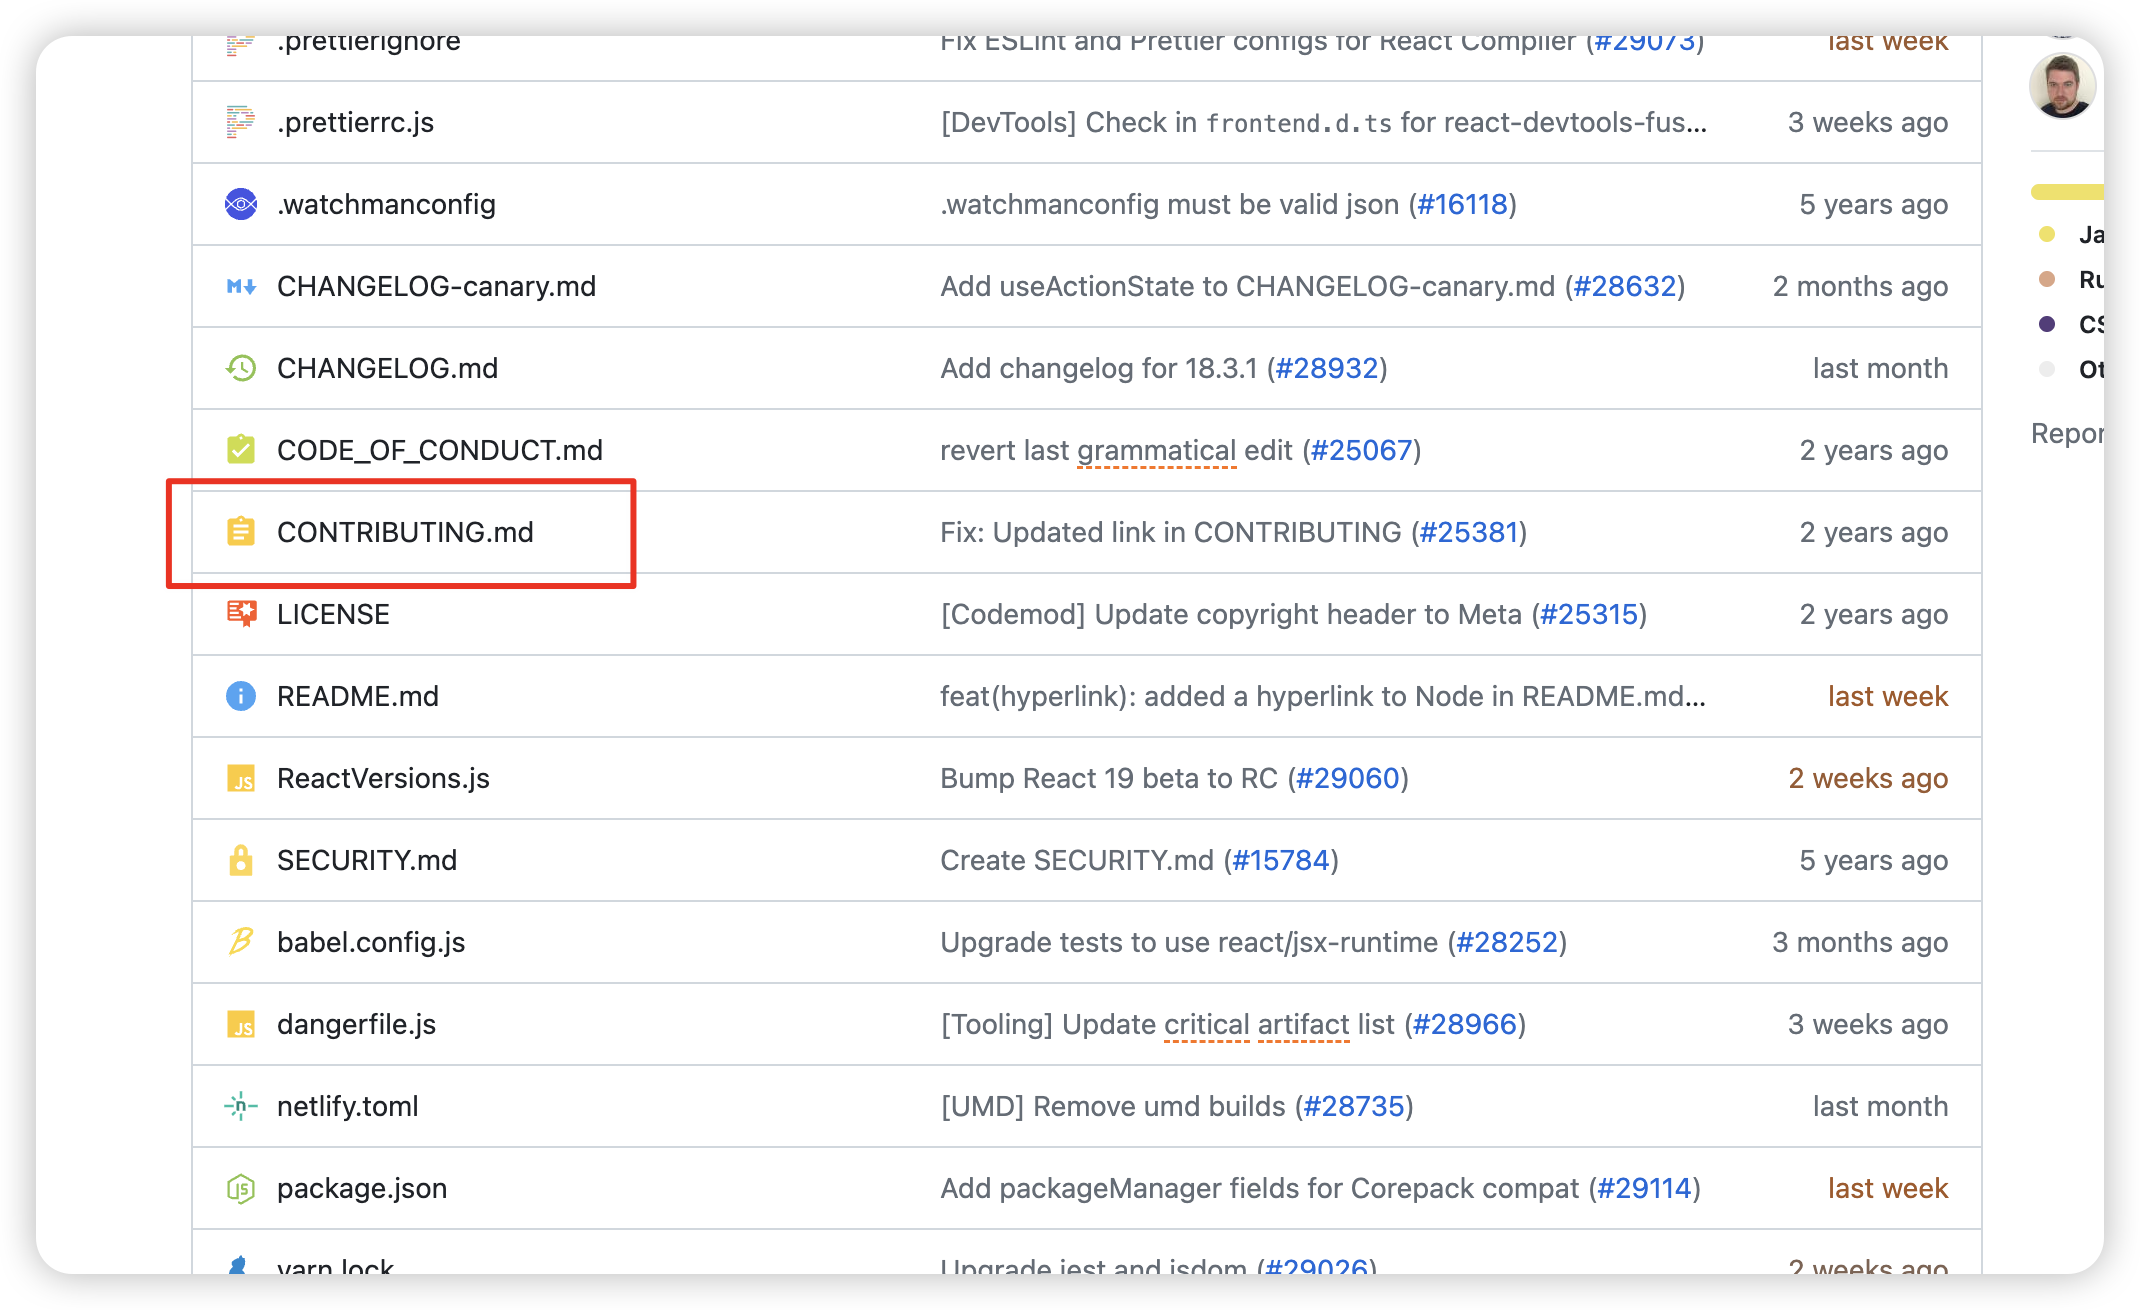
Usually, open-source projects have a CONTRIBUTING.md file, which tells other developers how to contribute to the project, or you can find some information about running tests and publishing actions in the .github/workflows of the project.
Download and clone the repository
git clone git@github.com:Debbl/react.gitVSCode Environment
Use VSCode to open
code reactPlugins
Because react is written in flow language (similar to ts), you need to provide support for the relevant languages in VSCode. Download the flow language plugin flow-for-vscode in VSCode.
{
  "recommendations": ["flowtype.flow-for-vscode"]
}
Settings
Create the following file in the root directory of the locally opened repository
{
  "javascript.validate.enable": false,
  "typescript.validate.enable": false,
  "flow.enabled": true,
  "flow.useNPMPackagedFlow": true
}
Explain the configuration here, the first two disable the default js ts checks, then enable the flow plugin, and use the flow running under
node_modules, these are actually enabled by default, see flow-for-vscode#configuration for more details.
Local Environment
You can directly refer to the official documentation contribution-prerequisites, but there are a few things to note
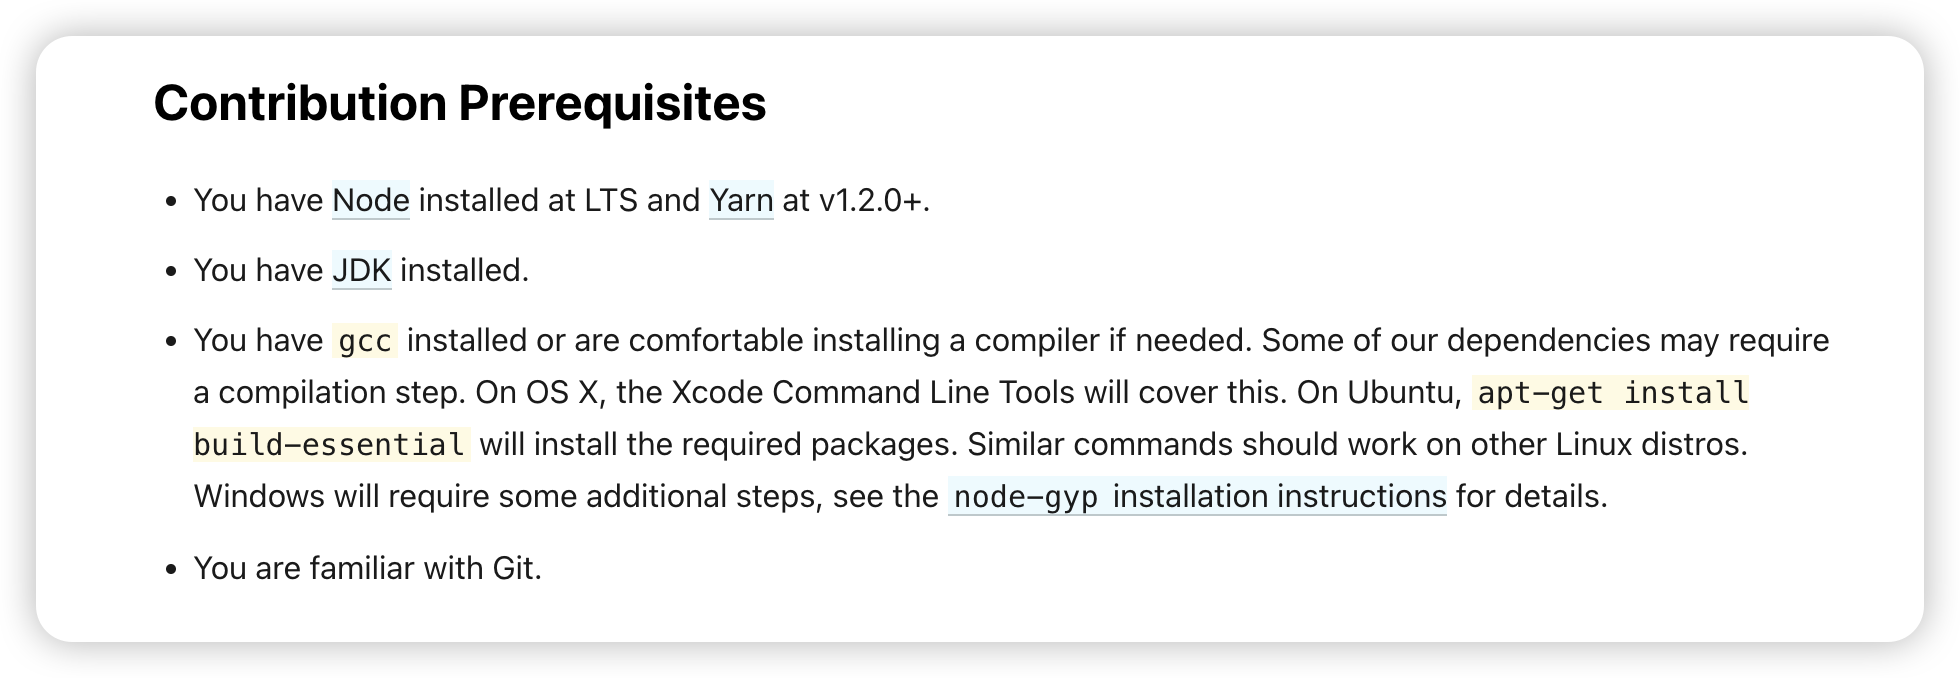
- The corresponding node version in
.nvmrc, install the corresponding version - The
packageManagerinpackage.jsonhas the corresponding yarn version - The java environment does not specify what version, I installed
java 17.0.11 2024-04-16 LTShere

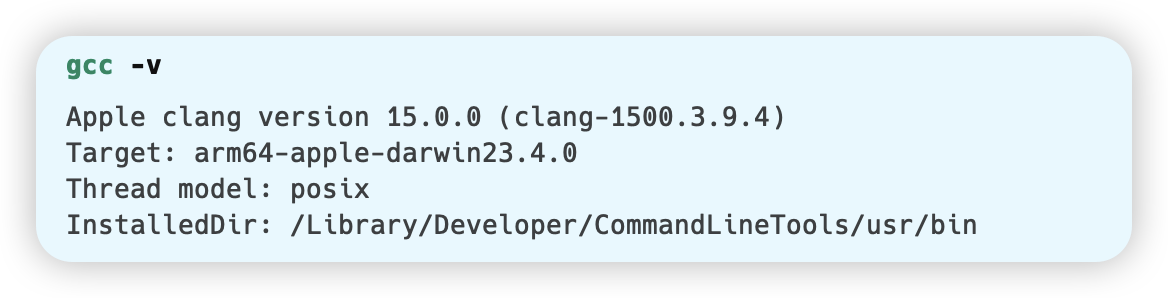
- gcc environment
Install Dependencies, Environment Check
You can refer to this part of the documentation sending-a-pull-request
Use
yarn.lockto install, here I recommend a good tool antfu-collective/ni, directly usencito install, I also reference other people's projects and write a rust version Debbl/nci
yarn install --frozen-lockfileBecause I use the M1 chip, I encountered several problems during the installation process
/bin/sh: autoreconf: command not foundUse brew to installbrew install autoconf- If the previous step is installed using brew, you will encounter a problem error-cant-exec-aclocal-with-homebrew-installed-autoreconf-on-mac Need to install
brew install automake optipng-bindependency error, you can see this optipng-bin/issues/117
Configure flow environment
yarn flowRunning this command directly will require you to select the corresponding environment
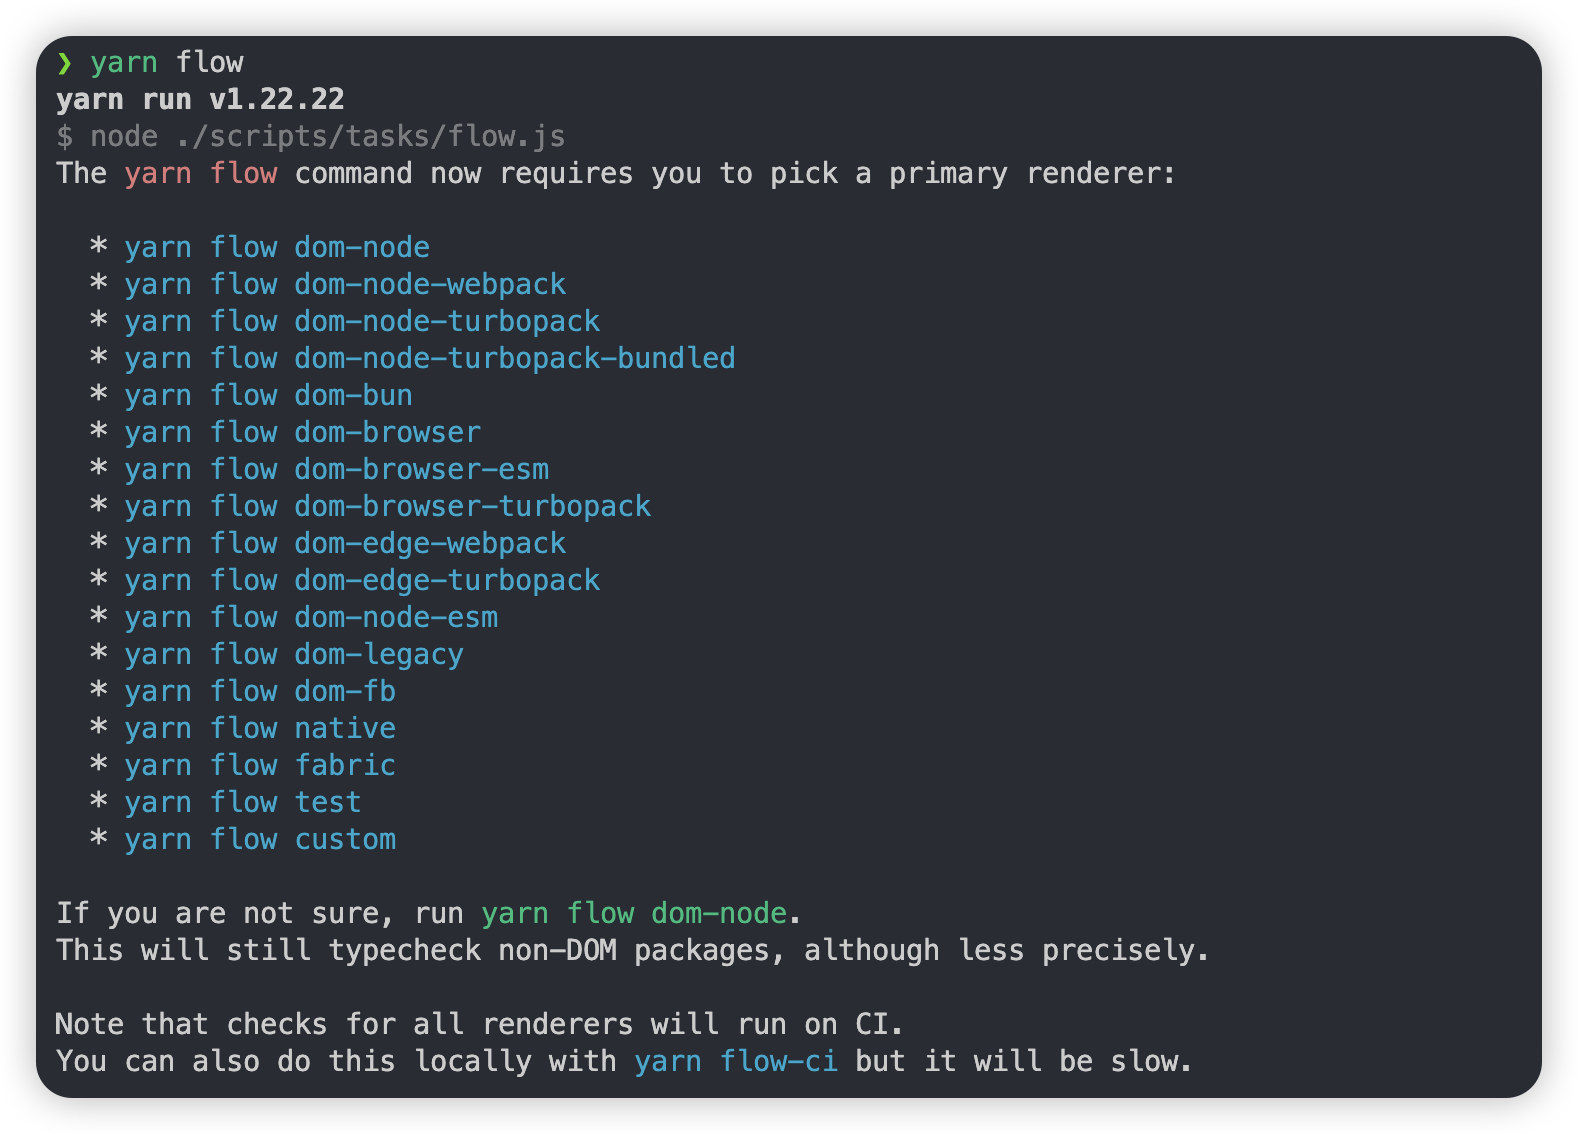
Use dom-node environment
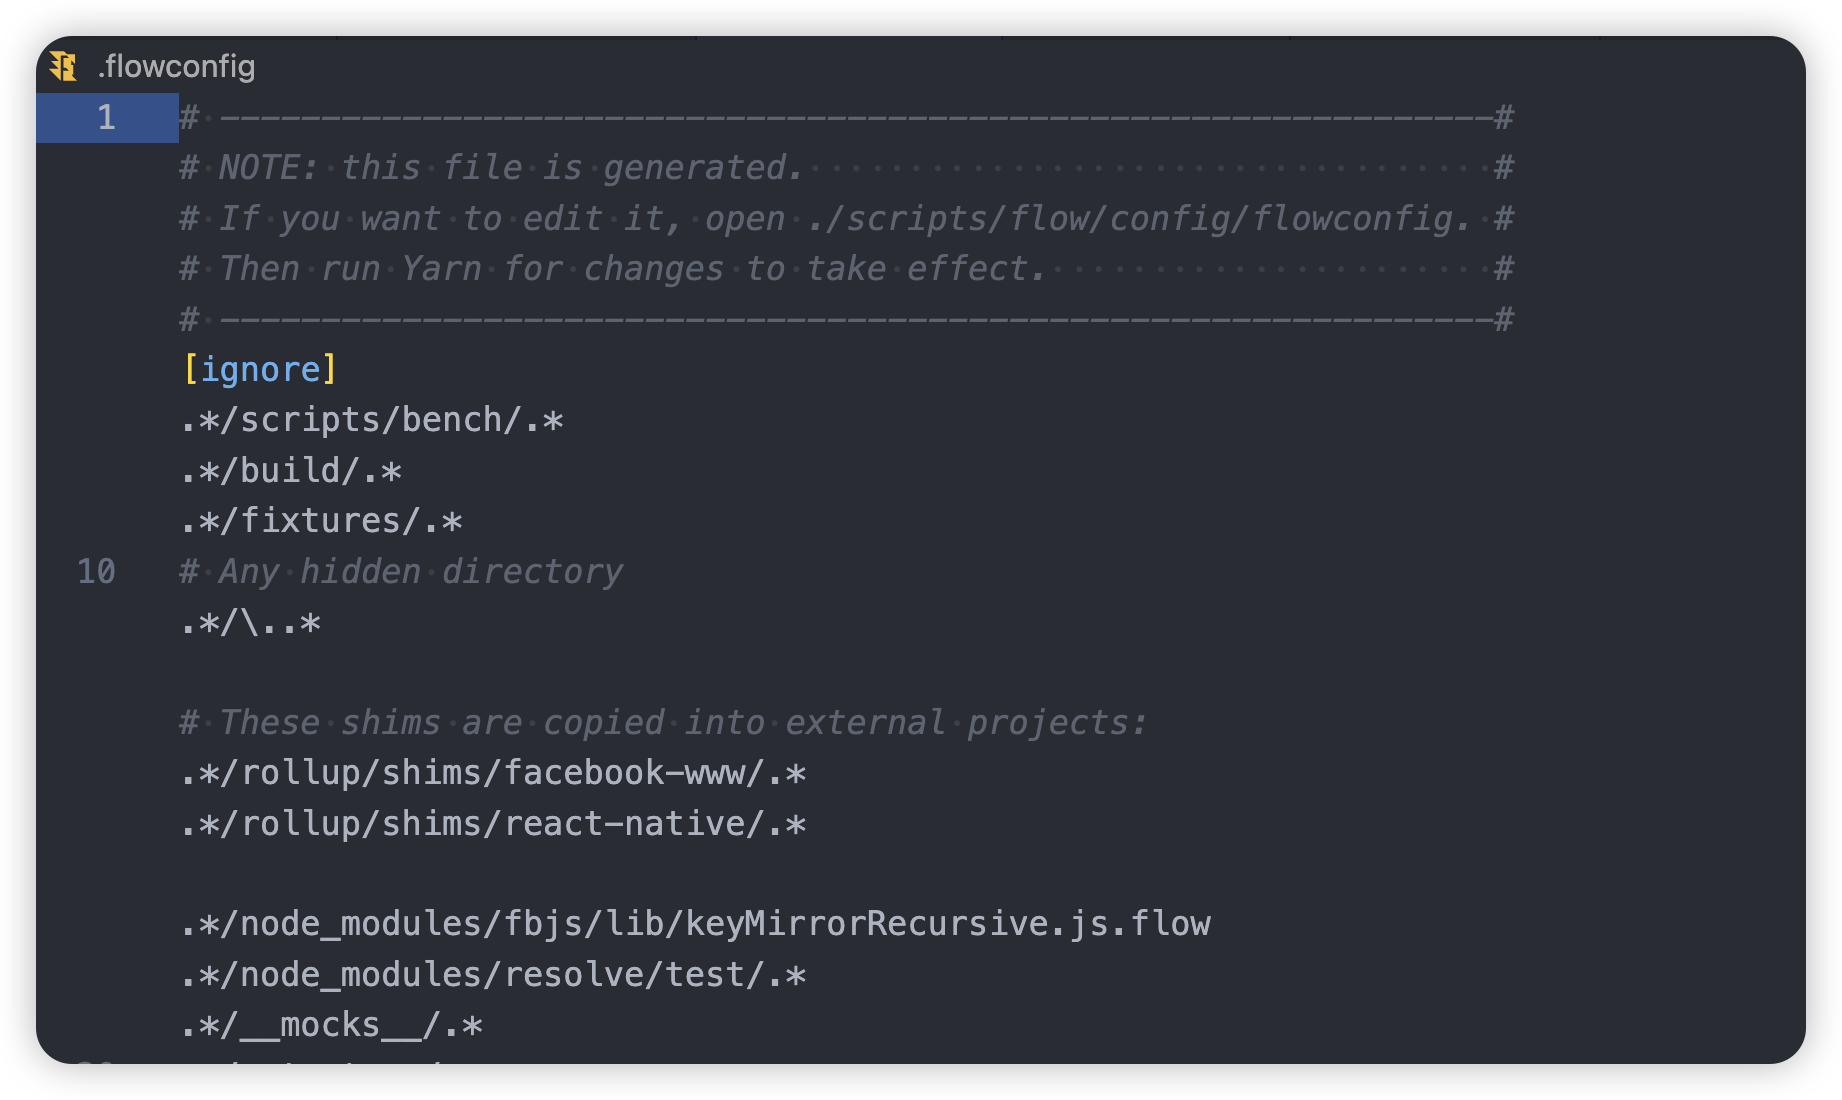
yarn flow dom-nodeAfter completion, you will find that there is a
.flowconfigfile in the root directory
Check if flow is effective
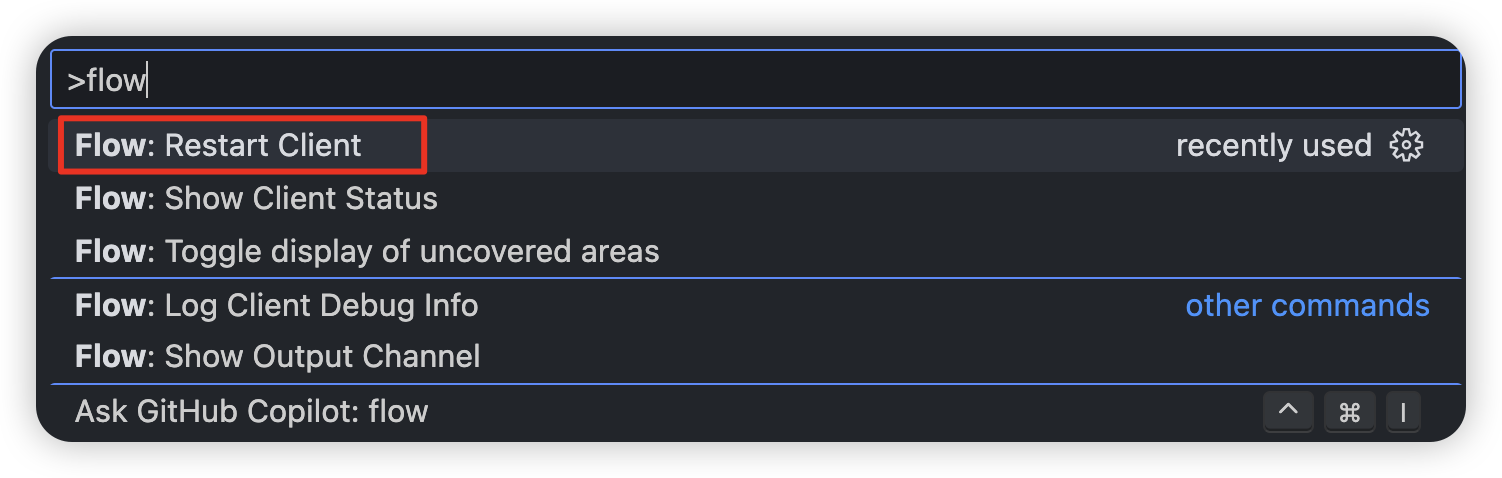
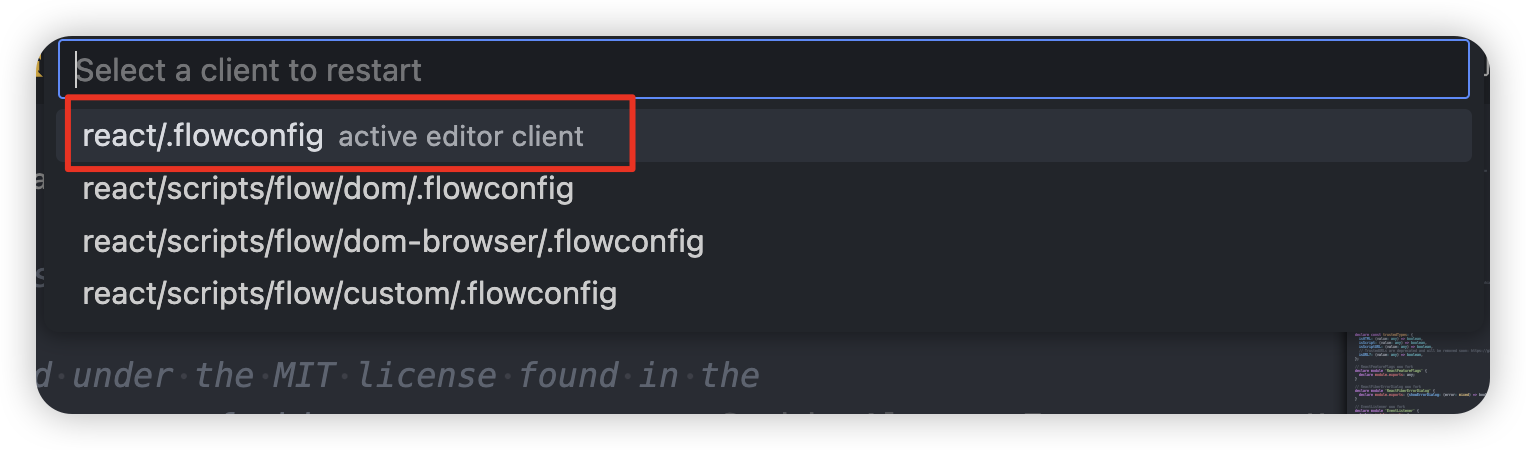


After completion, VSCode will have a prompt
Test, Local Run
yarn test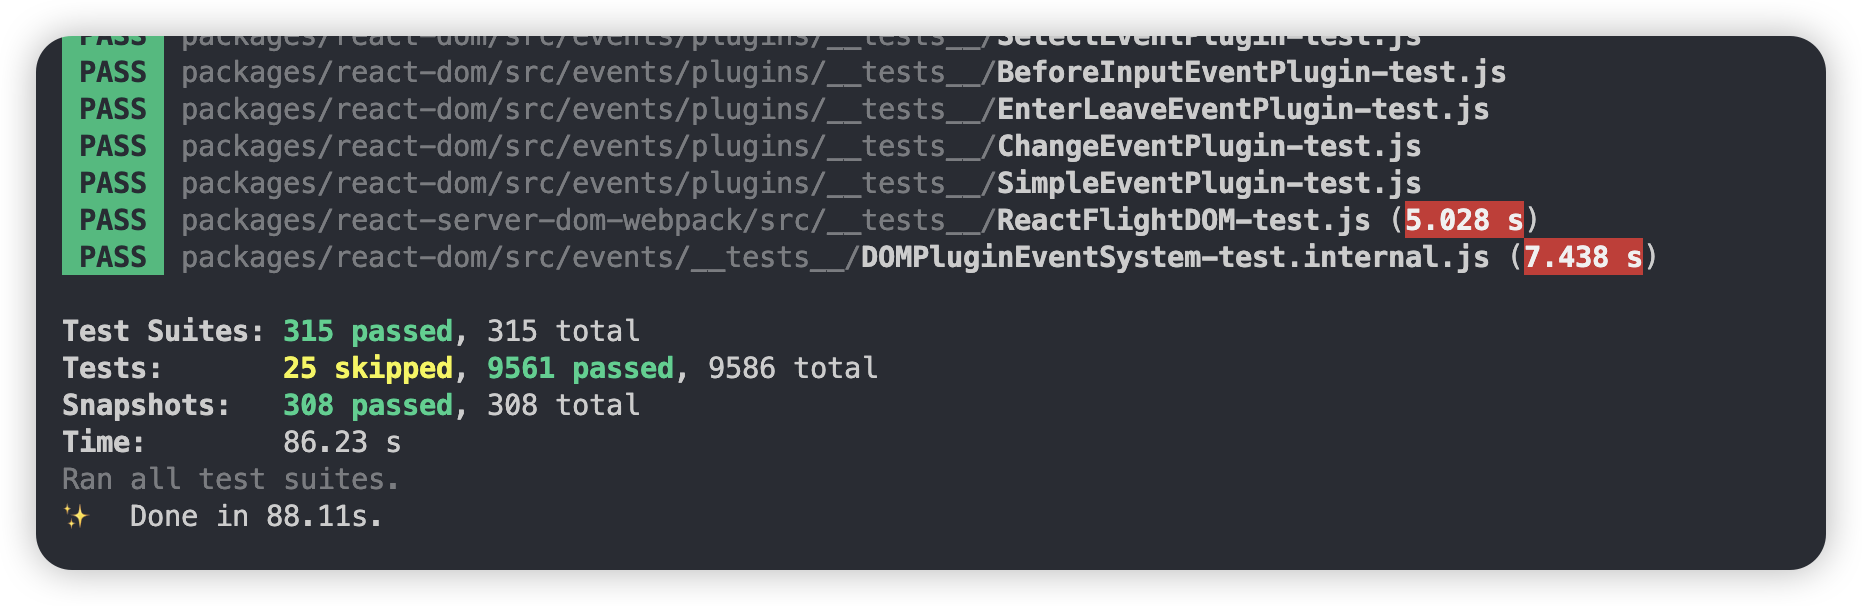
Local Run Packaged React
You can refer to the development-workflow part of the documentation
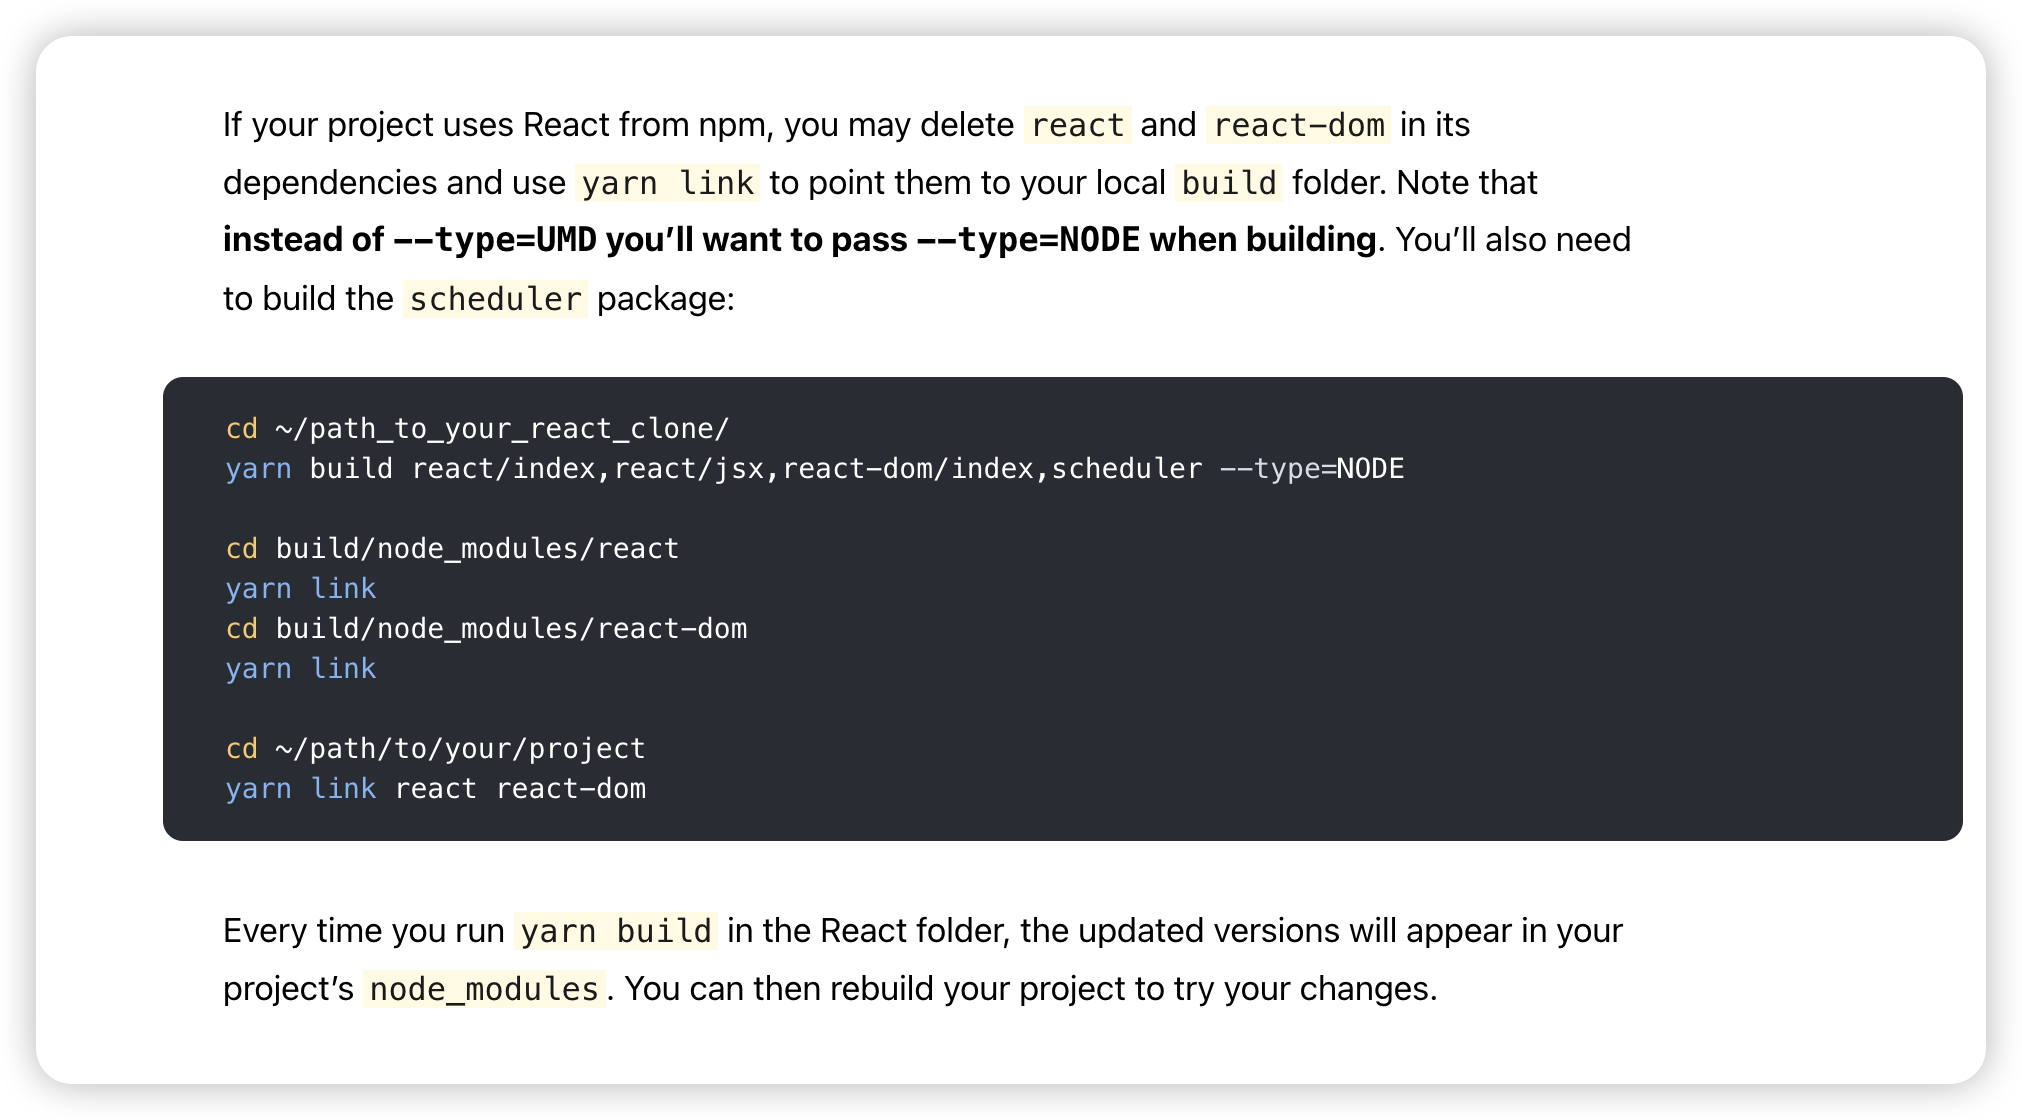
cd build/oss-experimental/react
yarn link

cd build/oss-experimental/react-dom
yarn link
Note that in the node environment, you need to link three repositories
reactreact-domscheduler
You can also directly use the environment in the
fixturesdirectory, here I usefixtures/packaging/webpack/dev
cd fixtures/packaging/webpack/dev

yarn

yarn build
You need to replace the
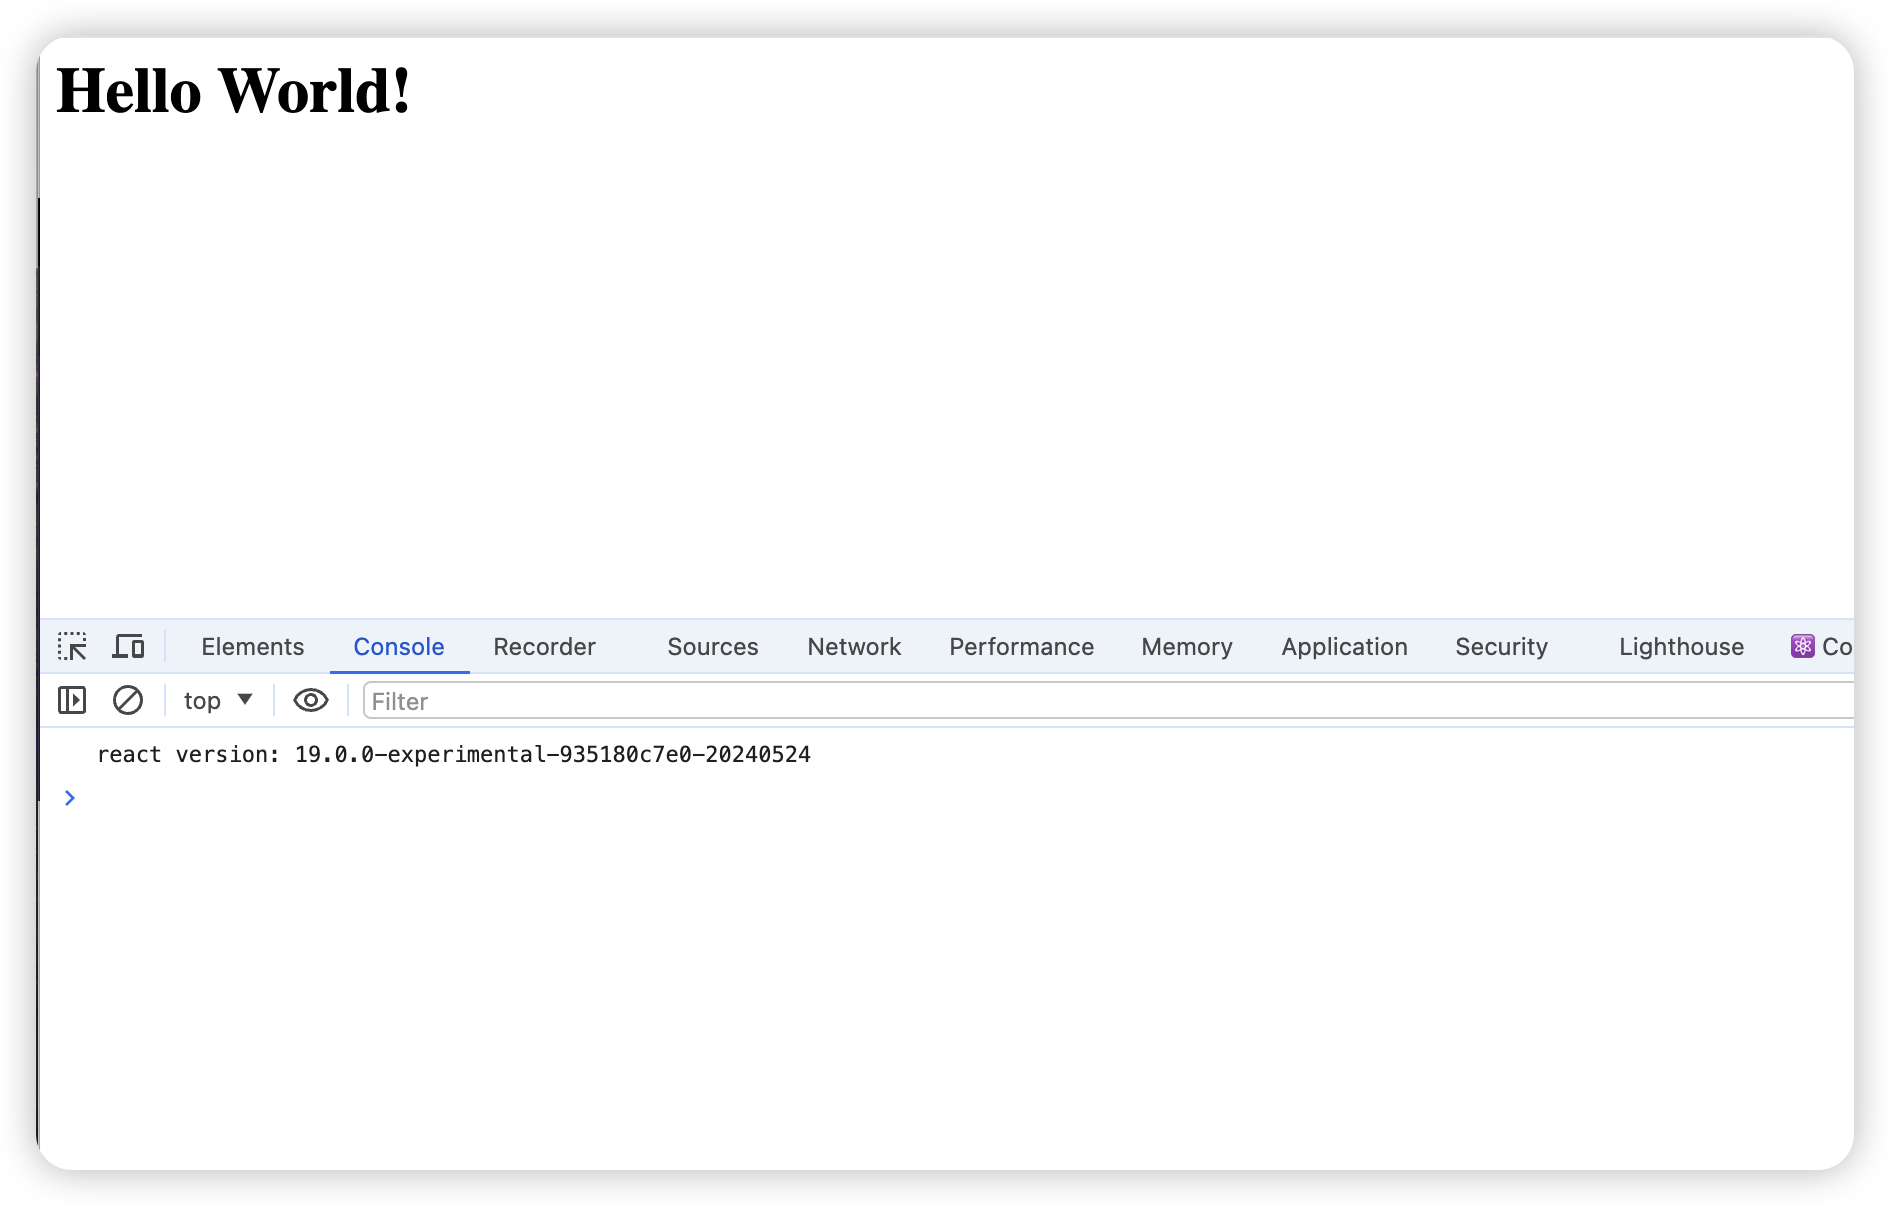
input.jsfile, the new version of ReactDom does not have the render function
var React = require('react')
var ReactDOM = require('react-dom')

ReactDOM.render(
  React.createElement('h1', null, 'Hello World!'),
  document.getElementById('container'),
)
var React = require('react')
var { createRoot } = require('react-dom/client')
console.log('react version:', React.version)
const root = createRoot(document.getElementById('container'))
root.render(React.createElement('h1', null, 'Hello World!'))Use LiveServer to open
fixtures/packaging/webpack/dev/index.html